
Cart

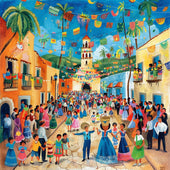
If you've ever been to a fiesta, you know there's one twine-bound, papier-mâché star that steals the show. Nope, I'm not talking about your Uncle José's eccentric sombrero. It's the vibrant, candy-stuffed creature that swings from the trees, taunting all the party-goers with its mysterious bounty of sweets. Behold, the piñata! The real dilemma is, why go through the heartache of bashing a store-bought piñata when you can unleash your pent-up frustration on a self-curated, labor-of-love piñata, crafted lovingly in the sanctity of your kitchen? Today, we're taking DIY to a whole new riotous, candy-raining level with our guide on how to prepare a traditional piñata kit at home.
No doubt, the homemade approach lends an unparalleled sense of personal attachment, not to mention, the cathartic joy of smashing your creation to bits in the end. Crafting your own traditional piñata is like a spicy taco - messy to consume, but oh-so satisfying! This interactive pastime not only gives you a chance to engage with a rich cultural tradition, but it is also an invitation for your friends and family to a bonding experience loaded with fun, laughter, and tons of creativity.
Alright, after perking up your interest faster than a churro disappears at a Cinco de Mayo party, it's time to reveal the secret sauce. Making your own traditional piñata at home is no Herculean task, and even the most uncrafty of us can triumph, armed with a piñata kit and a sprinkling of enthusiasm.
But what in the name of tacos does one put in a piñata kit? First, we're going for a traditional design, so let's gather up those basics. Masking tape – check. Newspaper strips – check. A gazillion paper streamers of all colors – check. And, of course, the star of the show (after the candy!), the balloon, around which your piñata magic will take form – check.
Okay, so we have our raw materials gathered, now prepare yourself for an adrenaline-filled crafting experience. And don't worry, no origami black belt is required here, just a pinch of creativity, a dash of patience, and a hearty sense of humor. After all, crafting a piñata is supposed to be more fun than a barrel of mariachis, right?
Now that we've gotten psyched up like a salsa dancer on Cinco de Mayo, let's get down to the creative nitty-gritty. You’re probably sitting there thinking ‘Alright, got my stuff…uh, what’s next?’ I'm glad you asked because it's time for the balloon! Give it a good puffing (we're talking as big as your Uncle José's sombrero if you can manage!) and then knot it. Remember this balloon acts as the skeleton for your piñata, so choose wisely my crafty friend.
Next in line is your trusty sidekick, the masking tape. I know, you may be looking at masking tape and thinking, ‘Really? That’s the next step?’ but bear with me here. Just like enchiladas and salsa, this combo needs to stick together. Bind the balloon with enough strips of masking tape to make it feel like a mummy in a Mexican pyramid. Always remember, more tape equals stronger piñata equals longer bat-swinging party fun. Simple math, isn’t it?
Time to revisit your kindergarten days, as you are about to dive headfirst into some fun-filled papier-mâché frolics. Remember those newspaper strips? Drench them in a gooey mixture of flour and water and slap them onto the balloon until it is fully covered. Yes, it's messy, yes it's sticky, but hey, so are the best traditions, right? And if you call your kids to join in the fun, it's a confirmed mess! But a fun-filled one, guaranteed to bring more laughter than your abuela's jokes.
One round of newspaper layering won’t do though, my amigo. Repeat this papier-mâché escapade a few more times until you're left with a thick, sturdy shell. Then, just like still waiting for that mole recipe from your tía, you need to patiently let it dry — and dry thoroughly. Crack a cerveza and do a little cha-cha, but remember – patience, like a good taco, can't be rushed.
Once your piñata’s drier than a desert cactus, you've reached the most festive stage of all. It's time to get freaky with those streamers you've been hoarding! Wrap them around your creation until you think it's ready for the carnival runway. Because there's nothing better than a piñata that sparks joy with its very appearance.
And lastly, don’t forget about the heart of the piñata. Surprise candies! Be as generous as your abuela during a Posadas night. After all, the bigger the candy rain, the wider the smiles, and the sweeter the party.
A moment of silence, please, for your balloon within. With a small cut, let it breathe its last, deflate and voila, you have your hollowness! Now, all that’s left to do is cut out a small flap (this is your candy loading bay), stock up on candies and reseal it with our ever-loyal friend Mr. Masking Tape. Now you're set, ready to hang it up high and start the party. Yes, you did it! You have successfully crafted a traditional piñata at home. It's piñata-bashing time!
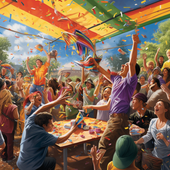
Who's ready to swing away? Be sure all invitees have plenty of room because you don’t want Tía Louisa’s summer dress getting an accidental wallop. Let the youths go first. Suggestion: Don't blindfold them immediately, unless you've proofed your living room for natural disasters. As the excitement grows, start spinning the older kids, those who aren’t scared to take on the world … or a candy-filled piñata.
Nothing beats the exhilaration of watching your handcrafted star take center stage, twirling tantalizingly as bat-wielding guests take their best shots. There is a burst of laughter each time the piñata escapes a deadly blow, its taunts echoing in the cheer of the crowd. Soak it in! This is your masterpiece of fun, built stitch-by-stitch in your own kitchen.
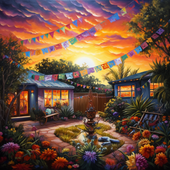
Seasons change, but the joy of piñatas never fades. Craft your own piñatas for birthdays, holidays, summer cookouts or just for a fun Saturday evening. Feel like hosting a winter fiesta? Fill your piñata with tiny wrapped gifts and shower your guests with a blizzard of presents. Autumn bonfires can start with the crackle of a piñata bursting open, spilling candies and joy into a huddle of excited kids.
The beloved piñata has been a part of our traditions for centuries. By crafting your own piñata, you're not just making a pretty, candy-filled party attraction. You're becoming a part of the vibrant thread that weaves generations together. Each handmade piñata helps keep this beloved tradition alive, adding your own chapter to the colorful, crafty, sweet-stuffed annals of piñata history.
As we come to the end of this candy-coated chronicle, we'd like to raise a glass – or rather, a piñata bat – to honor your DIY courage. You embraced the craft, the humor, and the cultural richness of the traditional piñata, and brought it to life on your kitchen table. We celebrate your triumphant journey from being a piñata rookie to crafting a piñata so envy-worthy, it's bound to be the talk of your friends and family. So, here's to you – the Crafty Piñata King or Queen! Now, let's bash some piñatas, shall we?

Listen Now 0:00 0m 00s left – 0:00 ...
Listen Now 0:00 0m 00s left – 0:00 ...
Listen Now 0:00 0m 00s left – 0:00 ...

Listen Now 0:00 0m 00s left – 0:00 ...
Listen Now 0:00 0m 00s left – 0:00 ...
Listen Now 0:00 0m 00s left – 0:00 ...
Listen Now 0:00 0m 00s left – 0:00 ...
Listen Now 0:00 0m 00s left – 0:00 ...
Listen Now 0:00 0m 00s left – 0:00 ...

Listen Now 0:00 0m 00s left – 0:00 ...

Listen Now 0:00 0m 00s left – 0:00 ...
Listen Now 0:00 0m 00s left – 0:00 ...
Listen Now 0:00 0m 00s left – 0:00 ...

Listen Now 0:00 0m 00s left – 0:00 ...
Listen Now 0:00 0m 00s left – 0:00 ...

Listen Now 0:00 0m 00s left – 0:00 ...
Listen Now 0:00 0m 00s left – 0:00 ...
Listen Now 0:00 0m 00s left – 0:00 ...
Listen Now 0:00 0m 00s left – 0:00 ...
Listen Now 0:00 0m 00s left – 0:00 ...
Listen Now 0:00 0m 00s left – 0:00 ...
Listen Now 0:00 0m 00s left – 0:00 ...
Listen Now 0:00 0m 00s left – 0:00 ...
Listen Now 0:00 0m 00s left – 0:00 ...
Listen Now 0:00 0m 00s left – 0:00 ...
Listen Now 0:00 0m 00s left – 0:00 ...
Listen Now 0:00 0m 00s left – 0:00 ...
Listen Now 0:00 0m 00s left – 0:00 ...
Listen Now 0:00 0m 00s left – 0:00 ...
Listen Now 0:00 0m 00s left – 0:00 ...
Listen Now 0:00 0m 00s left – 0:00 ...
Listen Now 0:00 0m 00s left – 0:00 ...
Listen Now 0:00 0m 00s left – 0:00 ...
Listen Now 0:00 0m 00s left – 0:00 ...
Listen Now 0:00 0m 00s left – 0:00 ...
Listen Now 0:00 0m 00s left – 0:00 ...
Listen Now 0:00 0m 00s left – 0:00 ...
Listen Now 0:00 0m 00s left – 0:00 ...
Listen Now 0:00 0m 00s left – 0:00 ...
Listen Now 0:00 0m 00s left – 0:00 ...
Listen Now 0:00 0m 00s left – 0:00 ...
Listen Now 0:00 0m 00s left – 0:00 ...
Listen Now 0:00 0m 00s left – 0:00 ...
Listen Now 0:00 0m 00s left – 0:00 ...
Listen Now 0:00 0m 00s left – 0:00 ...
Listen Now 0:00 0m 00s left – 0:00 ...
Listen Now 0:00 0m 00s left – 0:00 ...
Listen Now 0:00 0m 00s left – 0:00 ...
Listen Now 0:00 0m 00s left – 0:00 ...

💖 Feel the Spirit of Fiesta with LA AGUILA 💖 Some shirts are just fabric—but this one? It’s a symbol of your heritage, your roots, your spirit. Des...
View full details
🦅 Embrace the Spirit of Freedom with LA ÁGUILA 🦅 Some shirts capture a moment. But this one? It’s a tribute to the bold, fearless spirit of the eag...
View full details
💖 Spread Your Wings with La Águila 💖 Some shirts are just designs—but this one? It’s your spirit, your culture, your pride—perfectly captured in a ...
View full details
💖 Feel the Spirit of Tradition, Live the Fun 💖 Every game of Lotería brings memories—laughter, competition, and those moments of pure joy. But what...
View full details
💖 Embrace Your Heritage with a Bold Twist 💖 There’s a feeling that comes when you wear something that’s more than just fabric. It’s a story, a cult...
View full details
💖 A Memory You Can Hold Forever 💖 Some shirts are just clothes—but this one? It’s you. It’s your story, your culture, your memories—all brought to ...
View full details
💖 Embrace the Spirit of the Eagle 💖 This isn’t just a T-shirt. This is your chance to wear the symbol of strength, freedom, and pride—captured in...
View full details
💖 Fly High with a Piece of Tradition 💖 Some shirts are just clothes—but this one? It’s your connection to heritage. With the bold, vibrant Águila d...
View full details
💖 Feel the Spirit of Freedom with Every Wear 💖 Some shirts are more than just fabric—they carry stories, culture, and pride. With the LA ÁGUILA Cu...
View full details
💖 Unleash Your Inner Scientist 💖 They say science is a world of its own—an adventure that unlocks the mysteries of life. But this La Cínica T-shirt...
View full details
💖 For the Love of Science and Style 💖 Some t-shirts are just clothes, but this one? It’s a celebration of who you are—a passionate clinician, a bri...
View full details
💜 Unleash Your Superpower with Style! 💜 Some days, you just have to embrace the cynic inside of you. And now, you can wear it proudly. This El Cini...
View full details
💖 Wear Your Vibe, Embrace Your Culture 💖 Some shirts are just shirts—but this one? It’s your story, brought to life in vibrant colors and playful d...
View full details
💖 Your Vibe, Your Lotería 💖 Imagine walking into a room and feeling all eyes on you. Not because you're trying, but because you're effortlessly glo...
View full details
💖 Unleash Your Inner Icon 💖 Some shirts are just clothing, but this one? It’s a statement. A bold mix of fun, style, and culture—this isn’t just an...
View full details
💖 Your Heart, Your Story, Your Pride 💖 Some shirts are just shirts, but this one? It's more. It’s your personal celebration of love, culture, and p...
View full details
💖 Your Style, Your Story 💖 Every design has a story—but this one? It’s a celebration of you, wrapped up in the vibrant colors and playful spirit of...
View full details
💖 The Magic of Nostalgia and Culture Combined 💖 Some shirts are just clothes—but this one? It’s your heritage. It’s a joyful celebration of traditi...
View full details
💖 Wear Your Story, Live Your Legacy 💖 Every design tells a story, but some go even deeper. Imagine wearing a piece of your culture, your memories, ...
View full details
💖 Your New Favorite Tee 💖 Some shirts are just clothes—but this one? It’s you. It’s your story, your vibe, your roots—expressed in a fun, unforgett...
View full details


Leave a comment